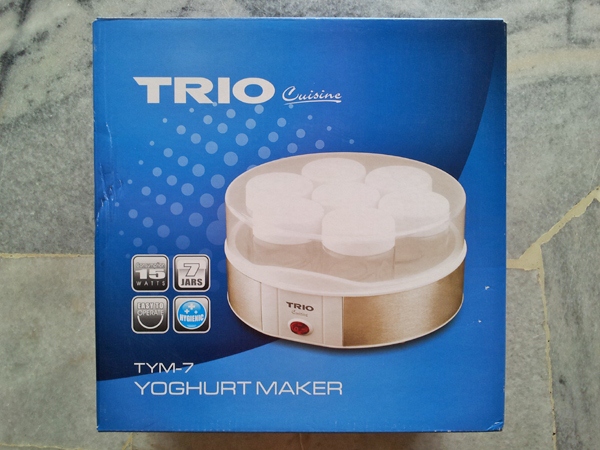
I have added two Kitchen appliances to my collection: Trio Yogurt Maker TYM-7 7 Cups and Philips Hr7629/91 Daily Collection Food Processor. Yogurt is good for health and we should add yogurt in our diet. Mum and I love yogurt and we take yogurt almost every day. I usually buy a large tub of ready-made plain natural yogurt (I used to buy Farm Fresh Natural Yogurt 1.5kg) which last about 8 to 10 days. However, purchasing yogurt for everyday consumption can be a pricey endeavor. I need a yogurt maker to make my own yogurt at home. I will not explain health benefits of yogurt here as you can find them easily by Googling.
Trio Yogurt Maker Instructions
| Specifications | |
| Model | TYM-7 |
| Rated Voltage | 230V~ |
| Rated Wattage | 15W |
| Frequency | 50Hz |
3 reasons to buy Trio Yogurt Maker:
- Easy to make and versatile. You do not actually need a yogurt maker to make homemade yogurt. I have seen people made yogurt with rice cooker and it is also possible to make yogurt with oven and slow-cooker. However, using a yogurt maker is the easiest way to make your own fresh natural yogurt. Yogurt maker creates a perfect temperature environment to expedite milk fermentation thus creating yogurt faster and with lesser hassle. It converts milk into nutrition-rich yogurt in just a few hours.
- Make yogurt in 4 steps. With just two ingredients, you can make yogurt at home: milk and a starter culture or ready-made yogurt. Pour the mixture of milk with starter culture into the glass jars. Place the jars without lids into the yogurt maker. Covered the yogurt maker’s lid and then switch the yogurt maker on. Wait 8 to 15 hours to complete without interrupt. Chill the yogurt in the refrigerator with lid tighten for at least 2 hours before serve. Scroll down for Yogurt Maker Recipes.
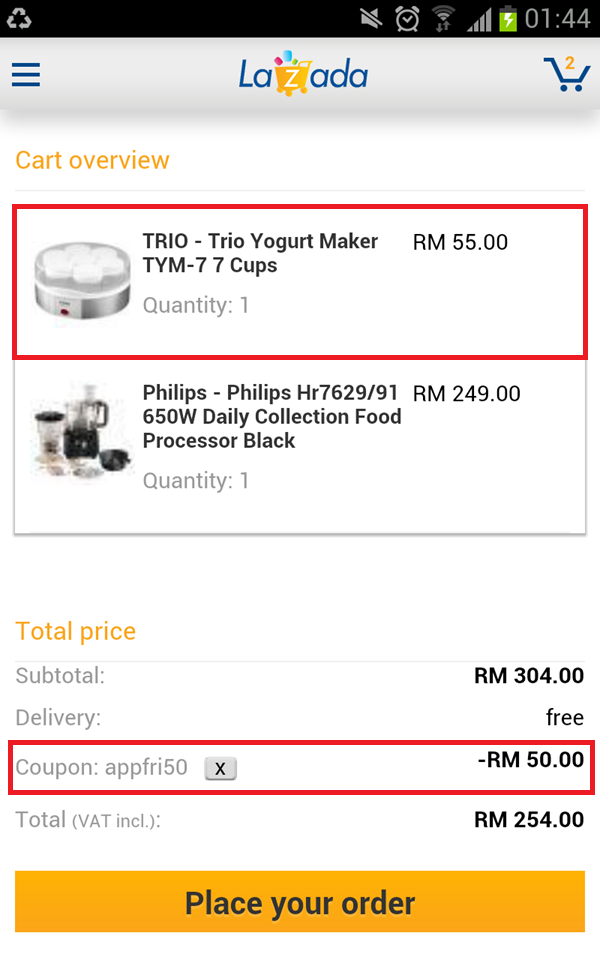
- Affordable and nutritious. Trio yogurt maker sells at RM55 on Lazada (read: Ways to save money on Lazada Malaysia). Yogurt characteristics are influenced by the milk and starter culture used. Different milks and different starter culture can result in different thickness, texture and taste. Read “Choice of Milk” below. You can create your own specialty yogurts using different types of milk for half the cost of store-bought yogurts. Your homemade yogurts are free from preservatives and artificial colors.


How to use a Yogurt Maker
General Safety Precautions:
Please read and save these instructions carefully before use.
- Make sure the current voltage which indicates on the plate is corresponding to your local voltage.
- Unplug the yogurt maker when not in use and before cleaning. Allow the yogurt maker to cool down before cleaning.
- Do not let the cord hang over edge of the table or counter or touch any hot surfaces.
- Place the yogurt maker on a flat surface. Do not place on heated surface.
- To protect against electric shock, do not immerse cord, plug or the yogurt maker in water or other liquids.
- Do not operate the yogurt maker with a damaged cord or plug. Any repairs should be carried out by the Customer Service Centre or Authorized Service Centre.
- Close adult supervision is necessary when operating the yogurt maker, especially where children are present.
- Never insert oversized food or metal foil or other utensils into the yogurt maker.
- This yogurt maker is intended for household use only.
How to use a Yogurt Maker for the first time:
- When using the yogurt maker for the first time, clean the jars, lids and the yogurt maker lid in hot soapy water. Rinse and dry.
- To prepare the yogurt jars, you need a litre of milk and a starter culture or readymade yogurt.
- Carefully mix a litre of milk with the starter culture and make sure that the culture blends in fully. For an optimal mix, beat the yogurt so that it becomes smooth batter and then add milk and continuing beat the mixture.
- Pour the mixture into the jar.
- Place the jars without the lids to the yogurt maker.
- Place the lid on the yogurt maker and turn power on.
- The yogurt maker will turn on and the mill will solidify.
- For better result, it takes 8 to 15 hours, depending on the type of milk used.
- Unplug the yogurt maker when it done and not in use.
Notes:
- Do not move the yogurt maker when it is on.
- Avoid location that may be subject to vibration or exposed to draughts.
- If you warm the milk slightly (37 degree to 40 degree), preparation will take lesser time.
Possible problems:
- Lumps – The milk was too hot or the ingredients did not mix long enough.
- Liquids on surface – The yogurt leave too long in the yogurt maker or the jars were removed too early or insufficient cooling.
- Liquids yogurt – The yogurt culture and the milk used had different fat content or excessive maturation time or the yogurt culture was not fresh enough.
Refrigeration of the yogurt:
Remove the yogurt maker lid and ensure that the condensation does not drip into the jars. Put the lids on the jars. Place the yogurt in refrigerator at least 2 hours before served.
Note: The shelf life of the yogurt which keep in refrigerator are between 8 to 10 days.
Cleaning:
1. Unplug the yogurt maker from the power supply and wait it for it to completely cool down before cleaning.
2. Use a soft damp cloth and hot soapy water. Rinse and dry. The jars and jar lids and yogurt maker lid are dishwasher friendly.
3. In case of any problems, please contact the Authorized Service Centre for help.
Choice of milk and starter culture
Advisable to use whole UHT or low fat UHT milk. This kind of milk does not need to boil before use and is the best to make good, firm and skinless yogurt. Do not use UHT skimmed milk.
Pasteurized milk is not sterile and it still contains bacteria that resist heat and that pasteurization has not destroyed. If you use this milk without boiling, a bacterial flora will develop. It is obviously not dangerous but causes a change in the texture and the taste of the yogurt. Therefore, the milk should be boiled, and the left to cool to eliminate the skin. Then use it in your yogurt. This milk will provide creamier yogurt, with a thin skin on top resulting from the cream rising to the surface.
Raw milk (fresh farm milk) must be boiled. It is recommended boiling for a longer time. Then, process will be same as pasteurized milk. Let it cool before using in your yogurt.
Comment: Whole milk is smoother and more aromatic. For thicker yogurt, you can add 2 or 3 tablespoon of powder milk and mix them thoroughly.
A starter culture consists in either:
- Plain yogurt (preferably whole milk yogurt) with an expiry date that is as far off in the future as possible.
- Yogurt that you made previously.
Note: Do not use your homemade yogurt more than 10 times as the new yogurt will not taste good.


Trio Yogurt Maker Recipes
Trio Yogurt Maker Recipes that included in the box (5 recipes).
Strawberry Yogurt
Ingredients:
1 litre of cold milk
1 plain yogurt or 1 packet starter culture
10 fresh strawberries
4 tablespoons strawberry syrup
Directions:
Cut the strawberries into cubes. Beat the yogurt in a bowl with a whisk and slowly add milk and syrup the pour into the jars. Distribute the strawberries evenly in the jars. You can add a grated half zest of lemon to the milk or yogurt mix. Then place them to the yogurt maker.
Alternative: You can replace the strawberry with pineapple, raspberries, orange and etc.
Yogurt with Syrup
Ingredients:
1 litre cold milk
1 plain yogurt or 1 packet starter culture
5 tablespoons fruits syrup (orange, blackcurrant, lemon, strawberry, raspberry, with strawberry, banana, blueberry, cherry, etc..)
4 tablespoons flower based syrup (rose, violet, jasmine, sandalwood)
4 tablespoons mint syrup
Directions:
Pour the yogurt or content of the starter packet into a bowl. Add the syrup and slowly blend in the cold milk, while continuing beating the mixture with a whisk. Pour mixture into the jars and place them to the yogurt maker.
Chocolate, Coffee, Caramel and Vanilla Yogurt
Ingredients:
1 litre cold milk
1 plain yogurt or 1 packet starter culture
3 tablespoons of powder chocolate or coffee, caramel ships, vanilla extract
Directions:
Place the chocolate in a bowl. Slowly add a cup of warm milk and continue to whip the mixture. Then add the yogurt or starter culture and mix well. Pour the balance of cold milk in while continuing beating. Pour mixture into the jars and place them to the yogurt maker.
Note: with powdered ingredients, is recommended to beat the yogurt with a spoon before served.
Zest Yogurt
Ingredients:
1 litre cold milk
1 plain yogurt or 1 packet starter culture
1 grated lemon or orange
Directions:
Grate the zest with spice grater and mix into milk. (Prepare the zest at least one hour before preparing the yogurt. For better result, it should prepare a day before).
Pour the plain yogurt into a bowl, beat it then add in the zest flavoured milk slowly. Add sugar to taste. Pour mixture into the jars and place them to the yogurt maker.
Jam Yogurt
Ingredients:
1 litre cold milk
1 plain yogurt or 1 packet starter culture
4 tablespoons of jam that is not too thick and has small berries or pieces of fruits
Directions:
Mix the jam with small quantity of milk. Add the yogurt or starter culture. Mix well, then pour the balance of the milk into it. Pour mixture into the jars and place them to the yogurt maker.
Check out my Top 3 yogurt smoothie recipes: Strawberry Apple Yogurt Smoothie Recipe, Blueberry Grape Yogurt Smoothie Recipe, Orange Mango Yogurt Smoothie Recipe
 Contact